 (412) 607-8548

How to Prevent Yard Damage During Tree Removal
Last Updated: November 12, 2026
Quick Summary
You can prevent yard damage during tree removal by planning the equipment access route and protecting the turf before crews arrive. Move belongings, mark irrigation and utilities, and match ground protection like plywood or mats to the equipment weight and soil moisture. Keep heavy equipment off saturated ground, and document existing yard conditions with photos before work starts.
- Call 811 for a free utility mark-out before any digging or stump grinding begins.
- Postpone the job if heavy rain is forecast within 24 hours of the scheduled start.
- Lay plywood over beds near the drop zone and wrap fence posts with old blankets or cardboard.
- Get damage responsibility in writing, including who repairs ruts or broken sod.
- Water new seed daily for the first two weeks after repairing the yard.
Table of Contents
- Will Tree Removal Damage My Lawn?
- Your Tree Removal Preparation Checklist
- Planning Tree Removal Equipment Access
- Protecting Landscaping During Tree Removal
- Controlling Falling Limbs and Trunk Sections
- Weather, Soil Moisture, and Contract Details
- Yard Repair After Tree Removal
- Book a Free Yard Assessment With Hilltop Tree Services
- Frequently Asked Questions
Will Tree Removal Damage My Lawn?
Yes, tree removal can damage your lawn, but most of that damage is preventable. The main causes are heavy equipment, fallen limbs, dragged trunk sections, and soil compaction. At Hilltop Tree Services LLC, we have handled removals for over 15 years, and the jobs that go smoothly are the ones planned before the saws start.
The good news: a few hours of prep work protects your grass, your landscaping, and your wallet. Below, we walk through the full process, from the first walkthrough to the final rake pass, so you know exactly what to expect and what to do.
Your Tree Removal Preparation Checklist
Preparation is the single biggest factor in avoiding yard damage during tree removal. A solid tree removal preparation checklist covers three things: what you move, what you mark, and what you agree on with the crew before work begins.
Here is the homeowner side of the checklist:
- Move cars, trailers, and boats off the driveway and street
- Clear patio furniture, grills, planters, and garden decor
- Take in kids' toys, bird feeders, and hanging baskets
- Mark sprinkler heads, drain covers, and shallow utility lines
- Unlock gates and clear a path to the work area
- Trim back shrubs along the equipment route
- Note any cracked concrete, weak fence posts, or damaged sod before work starts
- Confirm the drop zone and access route with the crew lead
The professional side covers rigging setup, drop zone control, and debris staging. Ask your crew who handles what, so nothing gets missed. A common mistake is assuming the crew will move your grill or garden hose. Most will not touch personal property. Move it yourself, or ask in advance.
Move Furniture, Vehicles, and Belongings
Anything within the fall zone or along the access route needs to go. That includes patio sets, grills, planters, garden hoses, and pet bowls. Vehicles should be parked well clear of the driveway, not just shifted a few feet.
Think about the path a heavy truck or trailer will take. If it crosses your lawn, move anything in the way. Also check the side yard and back gate. Crews often stage equipment there.
Clear Hazards and Mark Irrigation and Utilities
Walk the yard and flag anything a saw or a tire could hit. Sprinkler heads, drain grates, landscape lighting, and shallow irrigation lines are easy to miss and expensive to fix.
Before any digging or stump grinding, call 811 for a free utility mark-out. It protects you from hitting a gas, water, or power line. Mark your own irrigation lines with small flags too, since 811 does not cover private lines on your side of the meter.
Planning Tree Removal Equipment Access
Tree removal equipment access is where most lawn damage happens. Trucks, chippers, and lifts are heavy, and wet turf gives way fast. Decide the route before the equipment shows up.
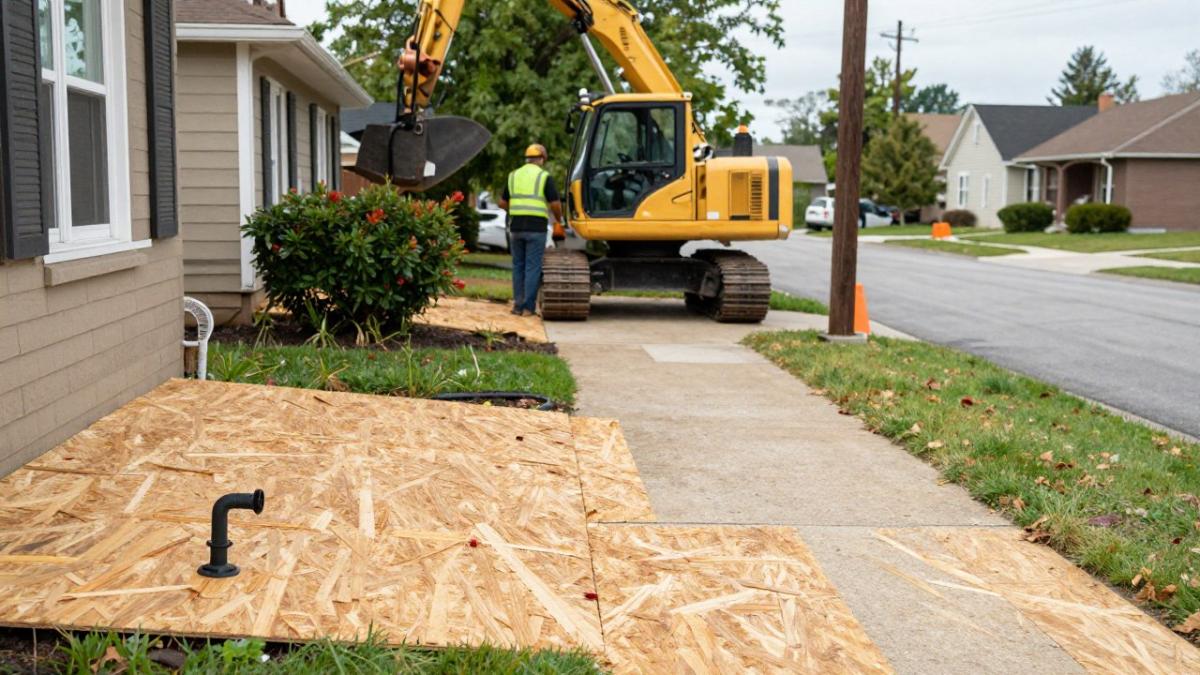
Map out a single access route from the street to the work area. Keep it as short and straight as possible. Then protect it. The right protection depends on three variables: how heavy the equipment is, how wet the soil is, and how many passes the route will see.
Matching Ground Protection to the Job
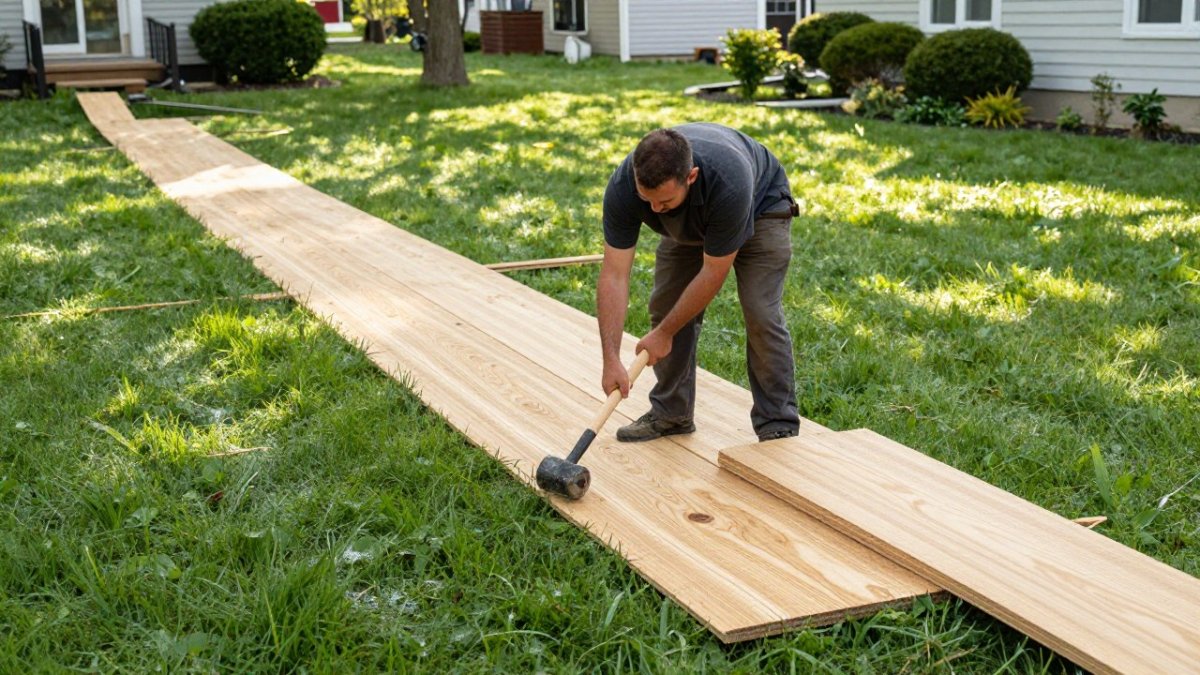
Not every job needs the same level of protection. A light tracked lift on dry ground is a different problem from a loaded chip truck crossing a saturated side yard. Use this framework to choose:
| Protection Method | Best For | Watch Out For |
|---|---|---|
| Plywood sheets (3/4-inch) | Light tracked equipment, short routes, dry to moist soil | Shifting on slopes; edges can dig into soft turf |
| Ground-protection mats (composite or timber) | Heavy trucks, repeated passes, soft ground | Rental cost and setup time; needs a flat staging area |
| Temporary trackways (steel or composite) | Wheeled equipment on lawns that must stay intact | Weight of the panels themselves; turning radius |
| Mulch or wood-chip berms | Beds, tree rings, and staging areas | Blowing into drains; needs refresh after the job |
| Restricted access (no equipment on turf) | Saturated soil, steep slopes, delicate landscaping | Slower job; may require climbing and rigging only |
Ask the crew which protection method they plan to use and why. A crew that cannot explain the choice is a crew that has not thought about your yard.
Preventing Soil Compaction and Ruts
Soil compaction is the quiet killer of lawns. One pass from a loaded truck can press the soil so tight that roots struggle for years. Ruts are the visible version of the same problem.
Keep heavy equipment off saturated ground, and ask the crew about ground protection along the route. Setting equipment up on the street or driveway avoids the lawn entirely. If the forecast calls for rain, reschedule or ask about a lighter setup.
Watch out: frozen ground handles weight better but can hide damage until spring, and saturated soil compacts faster and ruts deeper than most homeowners expect.
Weather and Soil-Moisture Decisions
Weather changes the access plan more than any other factor. Check the forecast before your scheduled date and walk the route after any rain. If the soil is soft enough that a boot heel sinks an inch, heavy equipment will do far worse.
Practical rules of thumb:
-
Postpone the job if heavy rain is forecast within 24 hours of the scheduled start.
-
Keep equipment on the driveway or street when soil is soft, even if it means more rigging.
-
Expect frozen ground to look fine in winter and show ruts and compaction once it thaws.
A short delay beats a torn-up lawn.
Protecting Landscaping During Tree Removal
Protecting landscaping during tree removal means shielding more than grass. Shrubs, flower beds, fences, and hardscape all sit in the danger zone. Plan protection for each one.
Simple steps go a long way:
- Lay plywood over beds near the drop zone
- Wrap fence posts and railings with old blankets or cardboard
- Cover AC units and meters with a tarp
- Rope off garden beds the crew should avoid
- Water the lawn lightly the day before, unless it is already wet
Ground Protection Options and When to Use Them
Not every job needs the same level of protection. Match the method to the weight and the ground.
| Protection Method | Best For | Watch Out For |
|---|---|---|
| Plywood sheets | Light equipment, short routes | Shifting on slopes |
| Track mats | Heavy trucks, soft ground | Cost and setup time |
| Mulch or wood chips | Beds and tree rings | Blowing into drains |
| Temporary fencing | Garden beds, shrubs | Needs staking |
| Gravel pads | Repeated traffic areas | Cleanup after the job |
For a closer look at protecting turf during the stump phase, see our guide on how to protect your lawn during stump grinding.
Controlling Falling Limbs and Trunk Sections
Falling limbs and trunk sections are the most visible cause of yard damage. A controlled drop protects the lawn. An uncontrolled one can crush shrubs, crack a patio, or dent a fence.
Ask your crew how they plan to handle the drop zone. If a tree leans over your roof or a neighbor's fence, ask how they will control the lowering of each section.
Weather, Soil Moisture, and Contract Details
Weather changes everything. Wet soil compacts faster and ruts deeper. Frozen ground handles weight better but can hide damage until spring. High wind makes any removal unsafe.
Check the forecast before your scheduled date. If heavy rain is coming, ask about moving the job. A short delay beats a torn-up lawn.
Who Pays for Damage? Scope and Documentation
Get the damage responsibility in writing before work starts. A clear contract should spell out:
- What is protected and how
- Who repairs ruts or broken sod
- What counts as normal wear
- How disputes get handled
Document the yard with photos before the crew arrives. Note existing cracks, bare spots, and fence damage. This protects both sides. Ask for proof of licensing and insurance, and confirm the crew on site is the company's own team.
Yard Repair After Tree Removal
Yard repair after tree removal starts with a simple walkthrough. Look for ruts, bare patches, broken branches, and damaged beds. Fix the small stuff first.
- Rake out shallow ruts and reseed bare spots
- Fill deeper ruts with topsoil before seeding
- Replace sod in high-traffic areas
- Refresh mulch in beds and tree rings
- Water new seed daily for the first two weeks
Leftover stumps and brush are the next cleanup step. If you have stumps to remove, our skilled stump grinding in Penn Hills handles below-grade grinding and surface roots. For brush, branches, and logs, our tree debris hauling in Penn Hills clears the yard fast.
Book a Free Yard Assessment With Hilltop Tree Services
A free assessment is the easiest way to protect your yard before any work begins. At Hilltop Tree Services LLC, we offer a free assessment before we quote. Our team is family-owned, licensed, and insured, and we do not use subcontractors, so the crew you meet is the crew that shows up.
Here is what to expect from the visit:
- A walkthrough of the tree, drop zone, and access route
- A review of ground protection options for your lawn
- A written scope covering cleanup and damage responsibility
- A clear quote with no surprise add-ons
Want to know exactly how the process works? Read our 5 steps to get your free tree assessment quote before your visit. Ready to schedule? Get a free quote for your service and we will find a time that works.
Your lawn does not have to pay the price for a necessary removal. With the right prep, the right protection, and a crew that plans the route before the first cut, you can keep your grass and landscaping intact. Get started with Hilltop Tree Services LLC and protect your yard from the first walkthrough to the final cleanup.
Frequently Asked Questions
How can I prevent lawn damage during tree removal?
Walk the property with the crew before work starts and agree on a site-specific protection plan. Mark irrigation heads, buried lines, and sprinkler valves, move furniture and vehicles, and designate a single equipment access route. Ask about ground protection such as plywood or mats on soft or sloped ground. Removing limbs in smaller sections with rigging, rather than felling whole, keeps the fall zone tight and limits yard damage. Get the scope and damage responsibility in writing before the crew arrives.
What should I ask a tree removal company about protecting my yard?
Ask four things: what ground protection they will use and where, which access route the equipment will take, how limbs and trunk sections will be lowered near structures, and who is responsible for repairing ruts or broken irrigation. Confirm they are licensed and insured and request a certificate of insurance. Ask whether the same crew quoting the job will perform it, since subcontractors can change accountability. A written scope that names these details protects you if something goes wrong.
How do I repair my yard after tree removal?
Fill ruts with topsoil and compact lightly, then reseed or lay sod in the same season. Rake out sawdust before seeding because a thick layer blocks germination. Grind stumps below grade and fill the hole with topsoil so the spot can be leveled and planted. Water new seed daily for the first two weeks. If heavy equipment compacted a large area, aerate before reseeding. Inspect irrigation heads and lines first, since damage there is easy to miss until the next watering cycle.


Get Your Free Quote
Join the 500+ homeowners who trust us with their tree services. Contact us to get a free quote for your project.


